
Have you got some scrap fabric hanging around at home that you don't know what to do with? Perhaps it's scraps and off cuts or bits of yarn from previous crafty projects, or maybe some old laddered tights, socks with holes or some clothing that is too worn out or stained to donate to charity. Here is a fun easy project to use up all these bits. You will end up with a fun functional home decoration and a smug feeling that you didn't send any of this to landfill.

For a long time I have been saving all my little pieces of off cuts and scraps that are too small to use in the hope I could use them as stuffing for my small sharks. After a bit of experimenting I found that whilst it does make an excellent stuffing it's too heavy and lumpy for the small sharks. So I did what anyone else does in this situation and packed it all in a bag and left it for a rainy day.
Now as I kept making I kept adding to this rainy day stash, the bag turned into 2 big bags and one cardboard box of scraps. Another scrap saving idea prompted me to get the bags and boxes back out and I finally got to making something that I could stuff with all these saved scraps.
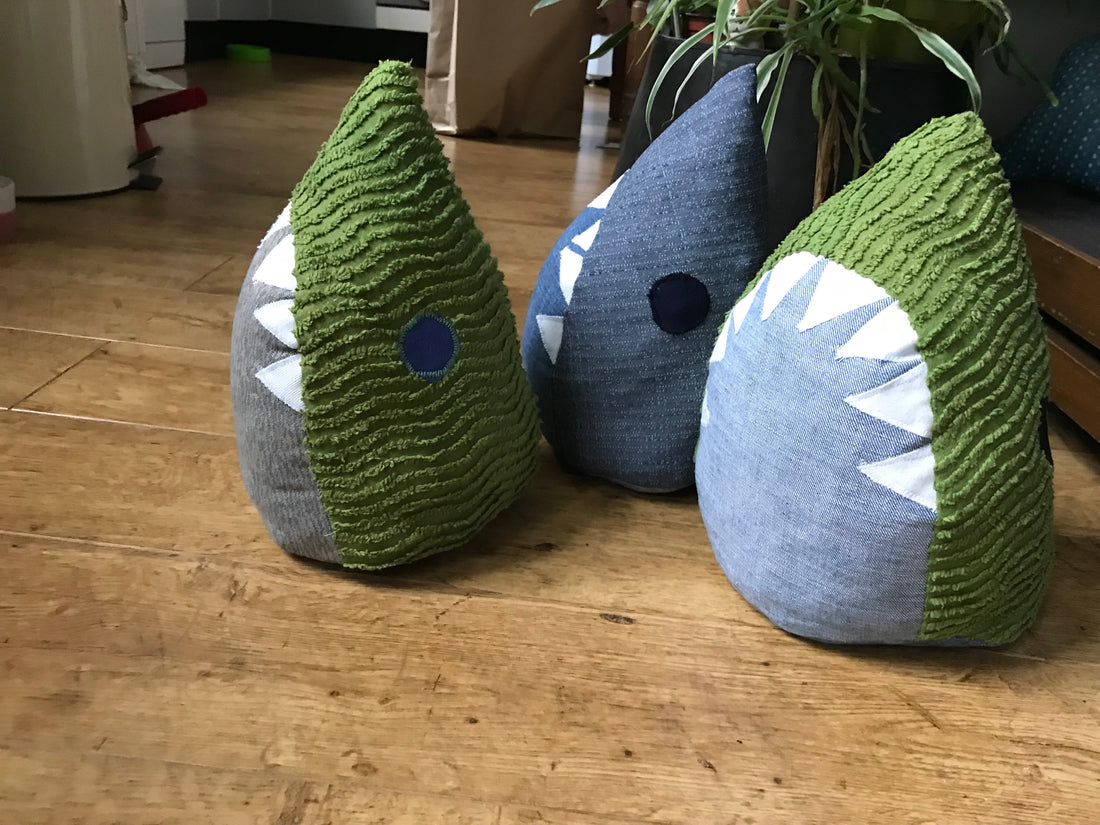
Here's the outcome, a shark's head doorstop to brighten your home and help out by holding doors open!
 .
. 
And here's how you can make your very own Shark head..
1. Firstly you need to draw out some pattern pieces, the shapes you need are quite simple, using this photo of my pattern pieces you can trace out your own and make it any size you want.
You might find it easier to cut the circular base once you have sewn the front and back head pieces together to get the right size.


2. Next lay the pattern pieces onto your fabric and pin in place before cutting around with sharp scissors.


3. Now you need to use some of your smaller scraps to cut some triangle teeth and 2 circles for eyes. Arrange and pin these to the right side of the flat pieces of fabric to make the face.

4. Once you have pinned them in place you can sew these in place (this technique is called applique) you can either sew them by hand or using a zig zag stitch on a sewing machine.

5. Now take the back piece that has the eyes on and fold it in half with the right sides of the fabric together. Pin across the short edge at the top and sew this together with one straight line.

6. Next step is to attach the front piece with the teeth, the easiet way to do this is by folding the teeth part in half longways to find the centre and match this point to the seam you have just made on the back part. Pin the pieces together starting at the top centre and working down each side to the bottom. Now sew these 2 pieces together, removing the pins as you go.


7. Nearly there! if you haven't cut your base piece yet you can now do so roughly measuring a circle to fit inside the open head pieces.
Next I added a small piece of velco so that I can leave the option to add some heavier stones or weights in future if it doesn't end up being heavy enough, but you can skip this step and and continue to attache the base without if you don't think you will need to.
here's where I attached the velcro to the right sides of each piece just along the edge..

8. Pin and sew the base piece to the head pieces, if you have used velcro start and finish at the edges of the velcro pieces, if you havent used the velcro remember to leave a gap to turn the head the right way round and to get the stuffing in!

9. Now turn the Shark head the right way and start stuffing!


Tips for stuffing.
- Cut up larger pieces with scissors to make it easier to get into the shark and create a less bulky and bumpy finish.
- use the handle of a wooden spoon or the other end of a paintbrush to pack the stuffing in tightly as you go, this will mean you can fit more in making it heavier and get a more even finish.
- pack as much as you can in so that you don't end up with any baggy empty spots
- Try to keep any harder seams or bulky bits in the centre so they don't poke out or remain visible on the outside.
- Keep going! this bit can take a bit of time but the more you can pack in now with result in a heavier doorstop and even look to the sharks head.
10. Pick out any treads or fibres that get stuck to the velcro and stick it together to seal. Or if you haven't used velcro hand sew the hole closed.
Now you just need to find a suitable door for him/her to hang out by!
If you are inspired to make your own let me know I would love to see!
